
Images (jpeg and png files) are a great way to complement text-heavy documents and support the content with visual aids. If you’ve worked with images in documents before, you’ll know they don’t always do what they’re supposed to do… Sometimes the elements of a document behave just as individually as human beings!
How an image behaves in your document really depends on what text wrapping has been applied to the image.There are several options for text wrapping which we can discuss later, but in this article, we’re going to be teaching you how to pull your image in line.
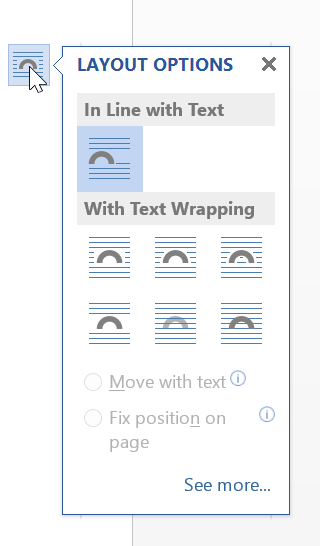
Pull Your Image In Line (with text)
By selecting this style of Text Wrapping, your image will take on the characteristics of text rather than all those normally associated with images.
What this means is that you can no longer move the image anywhere because it is “attached” to a Pilcrow, just like text, see below. So when “Dragging and Dropping” the image into a new location, you can only move the image to another line of text or another Pilcrow.

The advantage of pulling images in line with text is that the image will remain with that Pilcrow, even if more text is added to the paragraph. It will just move up and down depending on whether the text is added or removed.
The other advantage is that you can apply certain font formatting to the image! For example, if you want to centre the image between the left and right margins of the page, the In Line with Text wrapping makes this very easy.
Follow these steps to make it happen:
- Simply select the image and apply,

- Paragraph formatting to the image.
- t will then behave like text and centre itself between the left and right margins of the page. You can also do this to centre an image within a table cell as well as a normal text line.
- Too easy!
So remember that if you use In Line with Text wrapping you are more restricted in where you can move the image, BUT it gives you more control and certainty about the image staying put and not floating off somewhere else…
Need some help formatting your documents? Check out our other articles in The Dossier or Contact Us.
Leave a Reply
You must be logged in to post a comment.