
Welcome back, to Part 3 of our 5-part series, where we look at #3. To be honest, I can’t recall the last time I saw this feature used correctly.
Part 3: Tabs
No, I don’t mean an account at your local, where you pay for your drinks at the end of the evening.
I mean a Tab spacing character.
The purpose of a Tab character is to separate text by a uniform amount of space. It works like a table but without the gridlines and spacing.
In fact, Tabs are perfect when you have limited space on the page that won’t fit a table but you still need to display information in a tabular format. But you MUST have them organised and all in a row!
Types of Tabs
There are two different types of tabs, Default and Custom Tabs. We will examine the Default Tabs first as these are the Tabs most commonly misused.
Default Tabs
These Default Tabs appear in every new document. As a matter of course, without you having to do anything. In earlier versions of Word, you could see them as very fine lines on the Ruler bar precisely 1.27 cm (0.5 inch) apart. However, in the current versions of Word, they are harder to see.
To test out the Default Tabs:
- Click on the Show/Hide command. (This is so you can see the Tab symbols.)
- Move the cursor to a new line.
- Simply, press the Tab key on the keyboard and the cursor will move 1.27cm to the right each time.

Figure 1: Default Tabs 1.27cm apart
The only catch with using Default tabs is that to make them work well, the text to be separated by the tabs must be smaller than 1.27cm in width. Most of the time that is a tall ask.
This is the #1 one mistake I see people making when they use tabs. To compensate for text which is longer than 1.27cm – they add in another tab. See below:
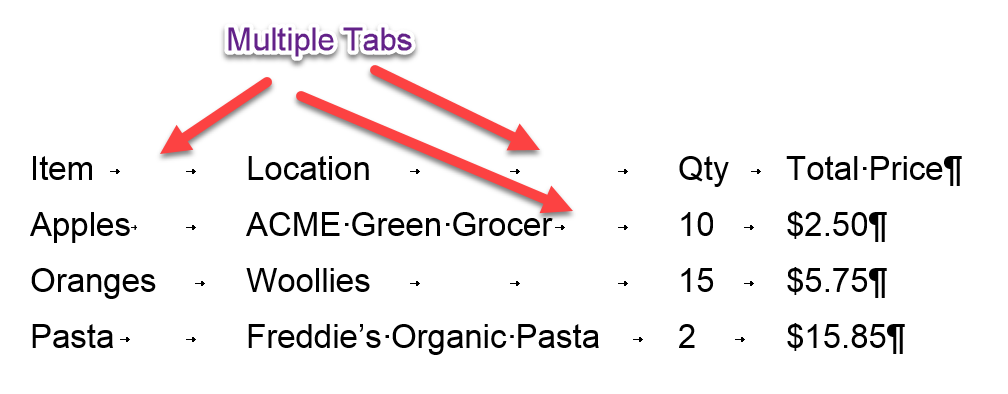
Figure 2: The #1 Tab Mistake, using multiple tabs to organise text into columns
Believe me, when I say – this is a NIGHTMARE to format! It does not fall under the ACE principles of formatting professional documents.
Working with Tabs is the same as working with Pilcrows. Just as there should only be 1 Pilcrow separating paragraphs, there should only ever be 1 Tab separating columns of text.
So how do you separate the columns so they can be easily read?
Custom Tabs to the Rescue
Custom Tabs have two major advantages over Default Tabs.
- You can select the alignment of the Tab (Left, Centre, Right, etc).
- You can choose the exact location of the Tab, thus ensuring the correct amount of space for each column of text.
Using Custom Tabs
To insert custom Tabs to correct the previous example:
- Remove the extra Tab marks between the columns so that only one Tab separates each column.
- Select the text to which the Tabs are to apply.
- Launch the Paragraph Dialog box.
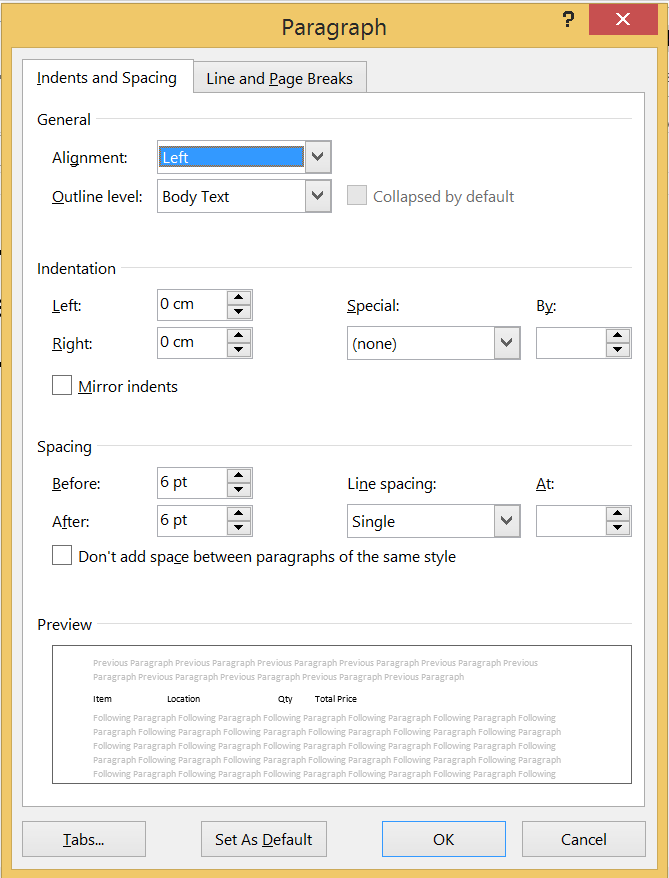
- Press the Tabs button in the bottom left corner of the dialog box.
- The Tabs dialog box will appear:
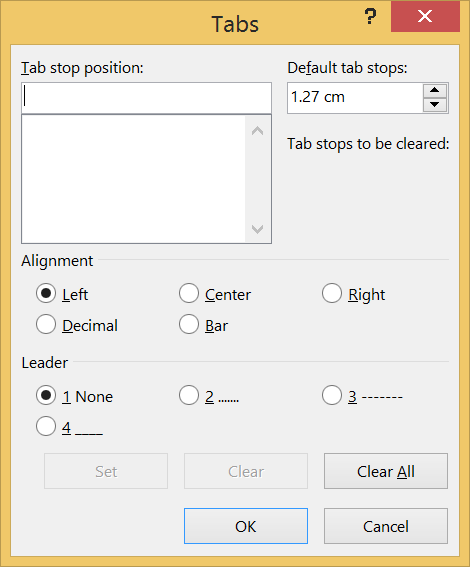
- Use the Tab stop position text box to enter the Tab location.
- The alignment of the Tab can be selected from the Alignment section below.
- For this example, we will insert the following Tabs:
Left at 4 cm
Right at 9 cm
Decimal at 12 cm (Aligns the numbers over the decimal place.) - Use the Set button to add a new Tab or the Clear button to remove a Tab.
- The Clear All button will remove all tabs displayed in the Tab stop position list.
- Click OK once all the Tabs have been entered.
- To align the Total Price heading over the Decimal Tab, click on the word Total and drag the Decimal Tab on the Ruler Bar to the 12 cm position or until you are happy with its location. (Be careful not to drag it into the page of the document as this could delete the Tab.)
The end result will look like this:
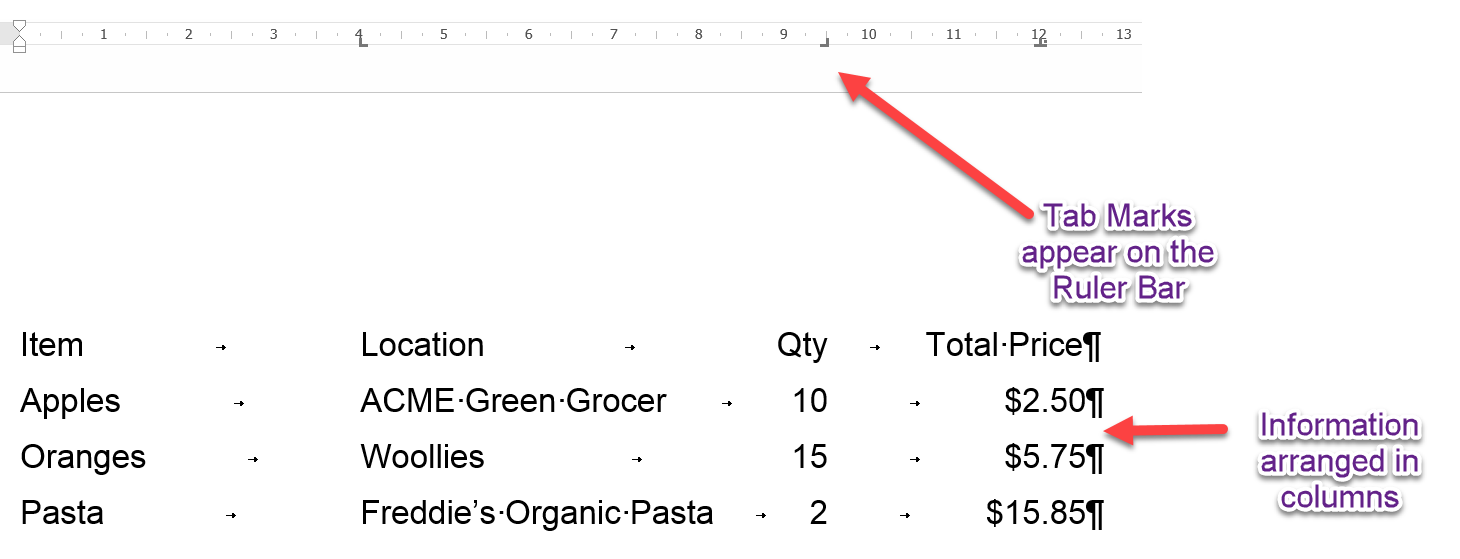
Figure 3: A tabular list of items organised with Custom Tabs
Too easy!
Remember, most people usually prefer to work with Tables than Tabs. However, Tabs are brilliant for those situations where space is limited and a Table won’t fit. So don’t ignore them – they are a very handy document formatting tool.
In our next article in the series, we explore the #2 Most Misunderstood Word feature.
Leave a Reply
You must be logged in to post a comment.