
If you’ve joined us for the past few issues of the Dossier you will know that we are in the final countdown (drum roll!) for the #1 most misunderstood feature in Microsoft Word.
As in, the NUMBER 1 thing most people use, but don’t really get, and are often frustrated when it doesn’t do what you want it to do.
It’s…
Section Breaks
OMG! As a professional formatter, these babies are used, misused and abused more than anything else I can care to name. Seriously. On more than one occasion I have described them as the bane of my life.
The concept is simple BUT most people don’t know how to use them! As a result, their documents very quickly slide into formatting ruin.
So, let’s start at the very beginning. It’s always a very good place to start…
What is a section break?
A section break divides a Word document into special formatting “sections”.
Let me explain. Next time you open a new Word document, take a look at the Status Bar at the bottom of the Word application. It will likely look similar to this:

By default, the first statistic is SECTION:1. This tells me that the current document has only 1 formatting section.
Sections refers to and control what I like to call the “foundation formatting” of a document (as opposed to text formatting). Foundation formatting includes things like page orientation, margins, headers and footers, page numbering as opposed to “text formatting” which includes things like font, colour, bold, italics and underline.
Foundation formatting can only be applied to an entire section.
Take a look at the Page Layout Tab of the Ribbon:
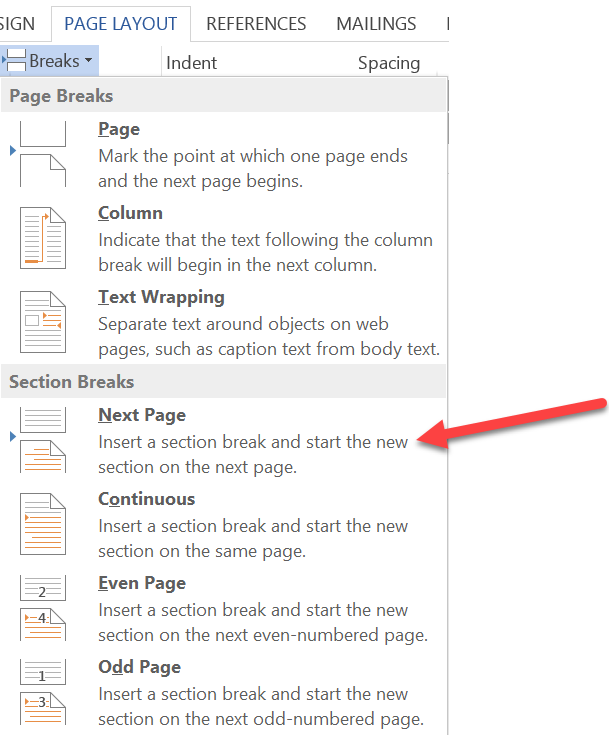
You will see that there are four different types of Section Breaks and each has their own unique qualities. In this article we will look at the Next Page section break which is by far the most popular.
When this break is inserted into a document it can be viewed by turning on the Show/Hide ![]() feature, and will look like this:
feature, and will look like this:

It performs two tasks:
- It inserts a new section break thus dividing the document into more than one formatting section.
- It inserts a new page.
What can you do with a section break?
The short answer is “lots of things”, but let’s look at a popular item and one which can cause a lot of angst – changing the page orientation.
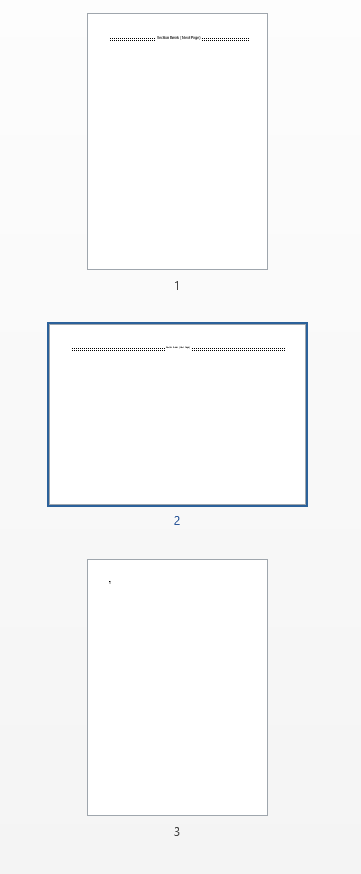
Let’s say you want to put an A4 landscape page in between 2 A4 portrait pages – something that’s often required in documents:
To achieve this you would do the following:
- Place your cursor at the bottom of the first page.
- Select Page Layout-Breaks-Next Page
Insert a Next Page Section Break. - The new section and new page will automatically be inserted into the document.
- Move your cursor to the end of the text area on the new page.
- Repeat step 2 above to insert a new section and new page. (You should now have 3 pages – if you started with a blank document.).
- Move your cursor onto the second page, which will also be Section 2.

The Status Bar will indicate the section in which the cursor is located. - Select Page Layout-Orientation-Landscape.
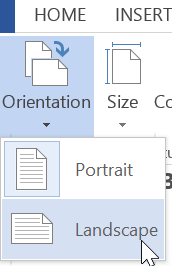
Change the page orientation of the current section to be Landscape. - The second page will now appear as landscape.
Additional pages can be added within each section and they will have the same orientation as the other pages within that section. For example, in the Portrait sections, additional pages will appear in Portrait. Whereas in the landscape pages new pages will only appear as landscape.
The other place where a lot of people get unstuck: trying to delete section breaks. The Golden Rule? Remove them by starting at the bottom.
The Golden Rule in action…
Uh oh. Now you want to remove the landscape page in the middle of your document and return the orientation to A4 Portrait on all pages. Don’t just start deleting section breaks willy nilly. Here’s what you do:
- Ensure there is an A4 Portrait section immediately following the landscape section. Whew in our case there is. So check!
- Place your cursor immediately in front of the Section Break at the END of the landscape area.
- Delete this Section Break.
- The result will be that the page orientation from the Portrait section, immediately below, will flood into the landscape section and replace the landscape orientation with portrait orientation.
Let’s be clear – when you delete a section break, the two sections before and after the break will become one and the formatting from the section immediately below will become the new formatting for the combined NEW section.
Keeping your sanity
Don’t forget, if things go a bit crazy you can always use UNDO (Ctrl + z) to restore the section break and the formatting. So don’t panic it can be fixed!
Working with Section Breaks takes a little practice and a little understanding of how they function, but they are an incredibly powerful feature of Word and one that you MUST master to be a professional document formatter.
Next time we will examine some of the other Section Breaks and see how we can add those to your toolkit.
Ciao!
Leave a Reply
You must be logged in to post a comment.